What a press does, and what it cannot
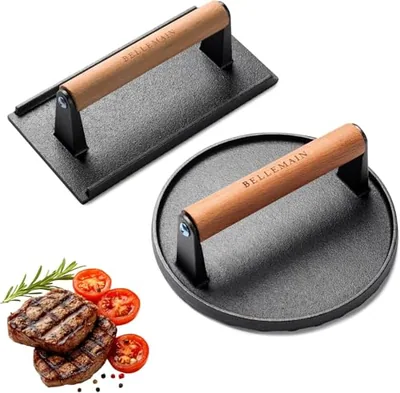
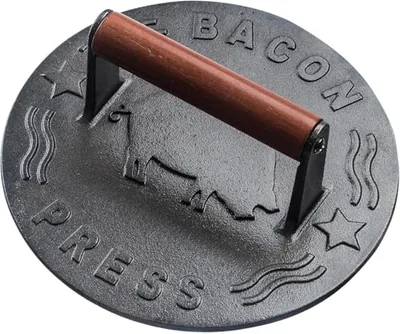
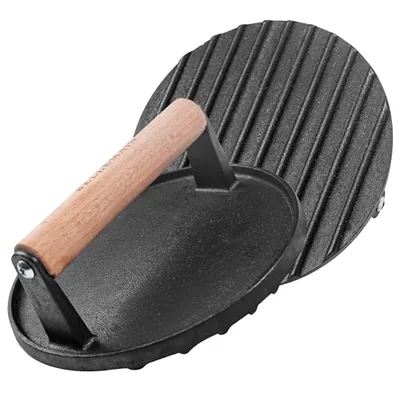
A smash burger press does one thing: it flattens a ball of ground beef into a thin patty that makes full contact with hot iron. That contact builds the dark, lacy crust you want. Our press is heavy enough to do the work with a single push. The weight spreads the meat evenly, so you get a quarter-inch patty with no thin spots that burn and no thick middle that steams.
What a press cannot do is flip the patty, season it, or tell you when it is done. It will not turn a thick, pre-formed patty into a smash burger. You have to smash the ball the moment it hits the hot surface. If you wait, the fat renders and the meat sets, and the press squeezes juice out instead of into the patty.
And a press is not a weight you leave on the meat. Press, hold a few seconds, and lift straight off. Any longer and you steam the crust you just built.
We make our press with a handle that sits high enough to keep your knuckles off the heat. It is a single-task tool, and we are fine with that. You will still need a spatula to scrape and flip, and a thermometer to check the center. The press just gives you the first step: a thin patty, a hot surface, and a crust that makes you close your eyes on the first bite.
Round, rectangle, seven inches: choosing a press
We make two presses because a griddle makes two shapes of patty. Our round press is seven inches across and sits flat on a standard burger. If you cook on a round cast iron pan, the round press fits it naturally. The rectangular press is longer and narrower.
It suits a flat top or a griddle where you work in rows. Neither press is nonstick. We left the surface bare cast iron so it seasons with use, the same way a skillet does. That means it will rust if you put it away wet. A quick wipe with oil after washing takes care of it.
| Piece | Shape or size | Material | Price |
|---|---|---|---|
| Smash Burger Press, Grill Press, Bacon Press- Set of 2, Gray | not stated | not stated | $24.95 |
| Smash Burger Press, Grill Press, Bacon Press, Meat Press, 7 Inch, Gray | 7 in | not stated | $19.99 |
| Meat Pounder & Flattener, Stainless Steel Kitchen Mallet, Black | not stated | Stainless steel | $20.95 |
| Smash Burger Press, Grill Press, Bacon Press, Meat Press - 7 Inch | 7 in | not stated | $12.99 |
| Stainless Steel Round Smash Burger Press 6 inches Burger Smasher, Silver | Round | Stainless steel | $17.99 |
| Smash Burger Press, Grill Press, Bacon Press - Rectangle, Gray | Rectangle | not stated | $19.47 |
| Smash Burger Spatula for Griddle - Stainless Steel Scraper Tool, Black | not stated | Stainless steel | $17.99 |
What a press cannot do is sense thickness. It flattens the ball of meat until the plate hits the cooking surface. If you want a quarter inch patty, you stop at a quarter inch. The weight of the press does the work. You do not have to lean on it.
The handle stays cool because we set it well above the plate. No plastic collar, no silicone grip. Just a flat cast iron handle that sits directly under your palm.
Choosing between them is mostly about the shape of your heat and the number of mouths you feed. The round press makes one patty at a time and feels right for a small batch, two or three burgers. The rectangle lets you line up patties in a row and smash them in sequence without crowding. Both weigh enough to hold contact through the sear. That contact is the whole point. No contact, no crust.
Smash, wait, scrape: the spatula's job
Smash, wait, scrape is the order we follow. The press does the first part. It flattens a loose ball of beef and holds it against the hot surface. The spatula handles what comes next. A just-smashed patty sticks. If you slide a spatula under it too early, the crust tears and stays on the griddle.
The wait matters more than the scrape. That release is the part people rush. We let the griddle tell us when the surface has released. Then we get the front edge under the patty in one quick pass.
Our griddle spatula is made for that release. We use it to get under the patty in one pass and carry it without folding the edges. It scrapes up browned bits when we want them back on the burger. What it will not do is smash. If you bear down with a spatula, the beef shifts sideways and the center goes thin while the rim stays thick. Use the press for that. Let the spatula lift, turn, and scrape. A flat griddle gives the edge a clean path.
This is not the tool for every job. If you like a thick pub-style burger, you will leave it in the drawer more than we do. It is also not a delicate fish turner. We use it where the crust is the point: smash burgers, chopped cheese, griddle onions, or clearing a spot before the next patty goes down.
The temperatures that matter
The chart beside this section is not decoration in our kitchen. We keep a printed copy near the grill tools and a second copy in the bag with the thermometer. Heat does the real work in a smash burger, but heat is also the part you cannot see. A press gets the patty thin. A spatula gets it off the iron. Neither one tells you when the center has reached a safe point. We cook with the chart open, not in memory.
Our part of this step is modest. We make the press heavy enough to hold contact and the spatula stiff enough to scrape, so the food spends less time out of the heat while you read a number. We test the presses with thin patties and the spatulas with real crust.
Ground Meats 160 degrees F (71.1 degrees C)
USDA Food Safety and Inspection Service, Safe Minimum Internal Temperature Chart. Read 23 August 2026. Source
What they do not do is manage the fire for you. If you want a tool that tells you when to flip or pull, this is not that tool. You still have to watch the grill and the chart. A person who wants precise but hands-off cooking should look elsewhere.
Beef, Pork, Veal and Lamb Steaks, Chops and Roasts 145 degrees F (62.8 degrees C) and allow to rest for at least 3 minutes
USDA Food Safety and Inspection Service, Safe Minimum Internal Temperature Chart. Read 23 August 2026. Source
We think of the temperature step as the pause in the middle of the cookout. The press has done its work. The spatula has released the crust. Now the work is patience and a clean reading. Keep the patty thin and the iron hot. Let the numbers carry the decision. We would rather have a cook lose a little char than serve undercooked beef to a table of guests. The chart next to this section lays out those numbers plainly. Keep it where steam and smoke cannot hide it.
The only way to tell if food is safely cooked is to use a food thermometer.
Centers for Disease Control and Prevention, Preventing Food Poisoning. Read 23 August 2026. Source
Resting, and the thermometer you should own
We don't sell thermometers, and we probably never will. But that doesn't mean we cook without one. A probe the size of a pen removes the single biggest variable at the griddle, and when you're working with thin patties that go from raw to overdone in ninety seconds, guesswork is the enemy. We use an instant-read digital model because it settles fast and the tip is narrow enough to test a smash burger without splitting it open.
The advice from food safety agencies is direct on this point , we've included the key lines below. What we'll add is simpler: color is a liar. A burger can look done on the outside while the center is still cold, especially if you pressed it straight from the fridge.
Always allow standing time, which completes the cooking, before checking the internal temperature with a food thermometer.
U.S. Food and Drug Administration, Safe Food Handling. Read 23 August 2026. Source
The same goes for a butterflied chicken breast or a thick steak you moved from a hot zone to a cooler spot on the grate. If you're cooking for anyone who needs to avoid undercooked meat, a thermometer is not a gadget. It's the cheapest insurance you can pack.
Resting matters just as much. Pull a patty off the iron with our wide spatula and let it sit a full minute before it hits the bun. That pause lets the fibers relax and the juices settle back into the meat instead of pooling on the plate.
For larger cuts the wait is longer, but the principle is the same. If you're the kind of cook who trusts a timer and a probe more than a finger poke, you'll get the same result on a Tuesday as you did on a Saturday.
The tool you carry to the cookout doesn't have our name on it , it probably says ThermoWorks or Taylor , and we're fine with that. A good thermometer and a little patience do more for a burger than any press ever could.
The meat pounder before the pan
A burger press smashes down. A meat pounder does the opposite. It stretches a cut sideways, thinning it out so every part of a breast or cutlet finishes cooking at the same moment. We make ours with a flat face that spreads force evenly. That matters when you move from ground beef to a chicken breast or a pork loin.
Without even thickness, one end dries out while the other stays raw. Our pounder does not tenderize tough sinew. It will not break down a shoulder roast. For that you need time, acid, or a blade. If your cooking rarely leaves the burger realm, this tool may sit in the drawer.
The head weighs just enough to do the work. You guide it, not muscle it. A textured side grips the meat so the pounder does not slide off a wet surface. The flat side gives you a clean, even taper. Fat and fibers rinse off under hot water.
A wipe with a towel and it is dry. We do not coat the head. Bare metal, no peeling, no flakes. The handle sits high enough that your knuckles stay clear of the board. We tested the angle until a cook could work a dozen cutlets without a cramp.
Use it cold, right from the drawer. A heavy pan or a rolling pin can work once. Our pounder works for years. A common mistake is whacking too hard. Short, even taps get you uniform thickness without tearing the grain. Once the meat is even, season it and let it sit a few minutes. Then your pan or grill can do what it does without fighting the shape of the cut.
Steak knives: serrated, by the set
A steak knife earns its place in the last four inches. The rest is handle, and we put most of our attention there. The blade is serrated because a crust should part without pressure. You should not have to saw, and you should not have to press the meat flat to get through it.
Our serrations are fine enough to start without tearing but deep enough to hold their bite through years of weeknight ribeyes and Sunday tri-tip. The steel does not carry a grade stamp, and we do not pretend otherwise.
| Set | Knives | Dishwasher safe | Price | Per knife |
|---|---|---|---|---|
| Steak Knife Set of 8, Serrated Stainless Steel, Dishwasher Safe, Black | 8 | Yes, stated | $38.99 | $4.87 |
| Steak Knife Set of 6, Serrated Stainless Steel, Dishwasher Safe, Black | 6 | Yes, stated | $33.99 | $5.67 |
| Steak Knife Set of 4, Serrated Stainless Steel, Dishwasher Safe, Black | 4 | Yes, stated | $27.99 | $7.00 |
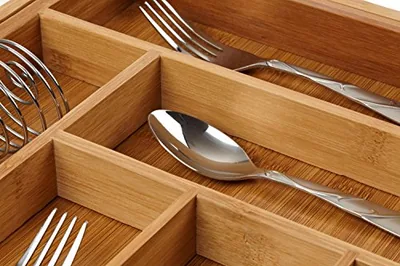
We sell these knives in sets of four, six and eight because one steak knife is a lonely object. Each set arrives with a bamboo block or a drawer tray. The block sits on the counter and takes up about as much room as a saltshaker. The tray tucks into a standard drawer and keeps the blades from knocking against the flatware. Both are bamboo, so they will darken a little with age and oil, the way a wooden spoon does. We like that.
A serrated knife will not give you a clean slice through a tomato. It will tear the skin unless the tomato is very ripe, and it will mash a soft peach. For those jobs you want a straight edge, and we do not make one.
What it will do is glide through a crusted steak, a pork chop with a bone, or a roasted pepper without asking you to sharpen it first. If you reach for a steak knife more than twice a week, the eight-piece set means you run the dishwasher less often.
Two hours, and the fridge
A cookout doesn’t end when the last burger comes off the griddle. It ends when the leftovers go into the fridge, and that needs to happen within a narrow window. After two hours on the counter, warm food enters a range where bacteria multiply fast. We watch the clock so nobody has to wonder whether the potato salad sat too long. The rule is simple, and a federal food safety chart beside this text spells it out in full.
Never leave perishable food out for more than 2 hours (or 1 hour if exposed to temperatures above 90°F).
Centers for Disease Control and Prevention, Preventing Food Poisoning. Read 23 August 2026. Source
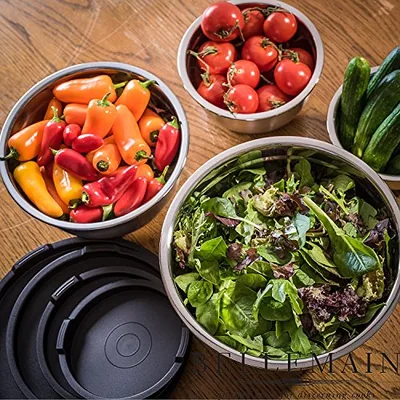
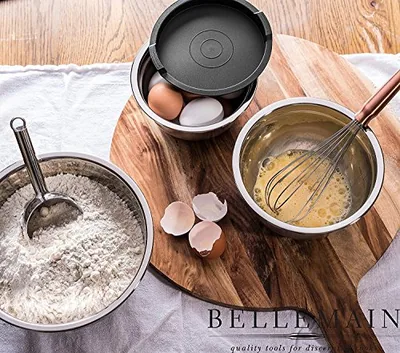
When the spatula rests and the press has cooled, our kitchen shifts from the grill to the refrigerator. A colander rinses the last of the lettuce. A set of mixing bowls with airtight lids accepts what remains: a few patties, a piece of chicken, the corn salad. We make those bowls in nesting sets of three, four, or five, and the lids seal with a press of the thumb. They stack. They fit a standard shelf. A tight lid keeps the onion smell where it belongs.
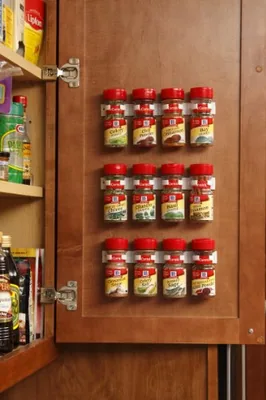
Refrigerate or freeze meat, poultry, eggs, seafood, and other perishables within 2 hours of cooking or purchasing.
U.S. Food and Drug Administration, Safe Food Handling. Read 23 August 2026. Source
We design for this moment as much as for the hot part of the meal. The bowl that held a marinade in the morning holds the leftovers at night, and it goes straight into the dishwasher the next day. We think about the hand that lifts it from the fridge at midnight, barefoot, looking for one more bite.
That hand should find a lid that opens without a fight and a bowl that does not tip when it sits on the edge of a shelf. The cookout ends in a quiet kitchen, with everything sealed, labeled if you are the sort who labels, and cold enough to be safe until tomorrow.
Cleaning the press and the griddle after the cookout
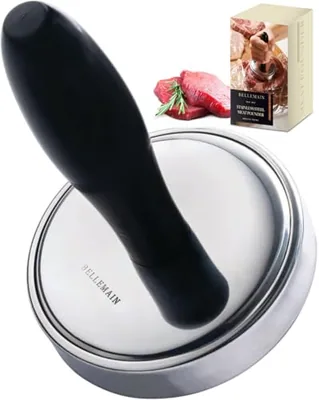
After the cookout, let the press sit until you can handle it bare-handed. We make the body from stainless steel, so it cools down reasonably fast and does not hang onto flavors from the last batch of burgers. That is a small thing until you go from beef to salmon fillets.
For cleaning, warm water and a drop of dish soap are all you need. A stray speck of cheese that welded itself to the bottom will soften under the hot water and lift right off with a nylon brush. We skip the abrasive pads because they can scuff the smooth surface over time. Dry it with a dish towel right away, and it is done.
The griddle, whether it is a flat top or a cast-iron pan, is easiest to clean while it is still warm. Fat and caramelized sugars slide off before they cool and harden. That is where our spatula earns a second job. Its thin front edge is stiff enough to smash a patty, but it is also the right shape for scraping.
It gets under any hardened residue without gouging the surface. If you are working on grill grates, a wire brush is still your best bet. For a flat surface, a few passes with the spatula, a wipe with a paper towel and a damp cloth, and you are done.
When both tools are dry, store the press flat in a drawer or upright on a hook. The spatula hangs from its hole or rests in a utensil crock. Neither piece asks for oiling or seasoning, stainless does not need it. Next Saturday you will pull them out and they will be clean and ready, no surprises. That is the point of tools that are simple enough to take for granted.
The cookout list
We pack light for a cookout. The press, the spatula, the meat pounder. If the meat is ground chuck, the press gives you an even sear. If it is a chicken breast, the pounder flattens it to a thickness that cooks through before the outside chars. A good spatula with a beveled edge gets under the patty without tearing. That is the core kit from our grill range, 7 pieces in all. Beyond that, you need a steady surface, a hot grate, and a thermometer you trust.
For serving, we like a wooden board and our four-piece steak knife set. The serrations start the cut without crushing the meat, which helps when the crust is perfect. A roll-up drying mat saves counter space afterward, and a stainless colander makes short work of rinsing greens for the table. We do not sell a grill, and we do not make aprons or tongs. Our tools begin where the hand meets the food. That is the point of the name: beautiful hands, doing the work.
If you have a press and a spatula, you have what you need. Add a pounder for anything that is not ground beef. Check your thermometer against boiling water once a season. And let the meat rest four or five minutes before the knife touches it. The rest takes care of itself.
Sources we read for this piece
- USDA Food Safety and Inspection Service, Safe Minimum Internal Temperature Chart, www.fsis.usda.gov/food-safety/safe-food-handling-and-preparation/food-safety-basics/safe-temperature-chart. Read 23 August 2026.
- Centers for Disease Control and Prevention, Preventing Food Poisoning, www.cdc.gov/food-safety/prevention/index.html. Read 23 August 2026.
- U.S. Food and Drug Administration, Safe Food Handling, www.fda.gov/food/buy-store-serve-safe-food/safe-food-handling. Read 23 August 2026.